Account Dashboard
Floatbot Account Overview & Managing Profile Settings
If you have logged in to Floatbot, here is everything about Account Overview. Click on the displayed name (or business name) on the top-right corner. You will see sub-categories - Profile, Security, User Management, and Logout.

Profile
This section allows you to modify your profile details. You can enter/modify data in the following fields - First Name, Last Name, Business Name, Website, Country, email, and Phone Number. Once you are done entering the details, click on the Update button to update the information.

Security
From the security dashboard, you can switch on or switch off either or both of these - Two Factor Authorization and Enable Password Protected Login.

User Management
The next sub-category is User Management, which offers many customization options.

From here, you can add a user (or users) and provide necessary permissions and access to bots.

1. Click on the + Add New Users button.
2. You will be asked to enter the User Name and Email Address. To begin with, fill these fields.

3. The next two options are Permissions & Bots. They are somewhat interconnected.

4. From the Permissions dropdown menu, select the specific functionalities you want to provide access to the user.
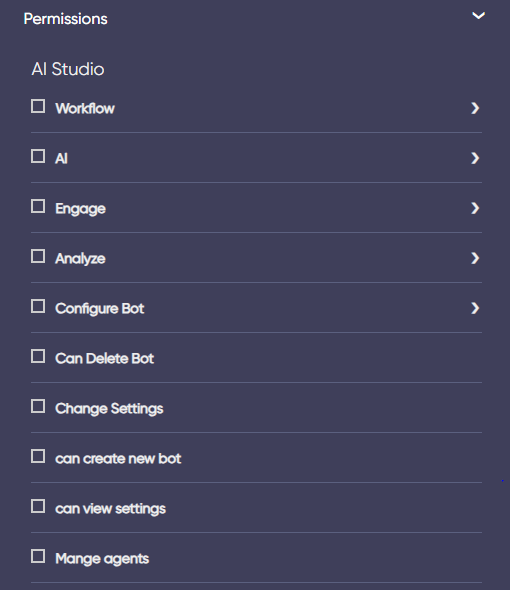
5. Like Permissions, you can select the specific bots you want to provide access to the user from the List Of Bots (Bots dropdown menu)

User Management - With A Brief Example
Let’s say you are a Pizza company called Floatizza. You have created a chatbot called DP-Floatizza to over seamless chat support to your customers. Now, you have hired a Quality Analyst in your company to check the quality of the chatbot responses.
In such a scenario, the Quality Analyst must have access to certain functionalities as well as the DP-Floatizza bot to perform his regular duties. Here is a possible set of functionalities that you can provide access to him.
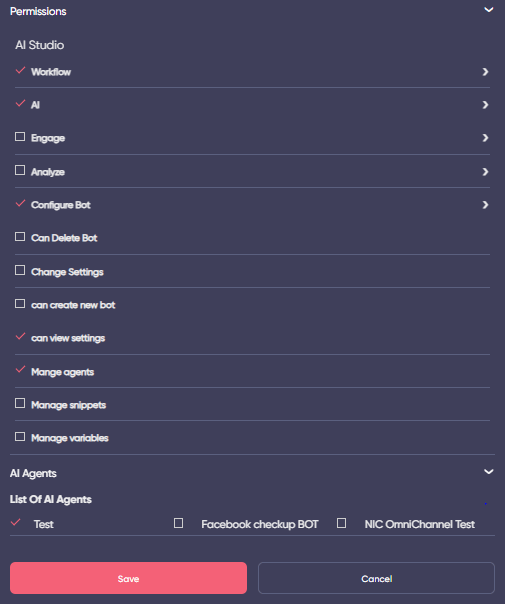
Upon selecting all the functionalities as well as the relevant bot for a user (Chatbot Quality Analyst in this case), click on the Save button to save all the changes.
Note: You must turn on Status to provide all the necessary access. At any given time, you can also choose to turn off the Status to deny access.

Deleting Or Modifying Users
Once you have added users, they will be listed on the Users Dashboard. You can update or delete a user by clicking on the 3 DOT Action button.

