Integrate with iOS app
Prerequisite
- Bot_ID
- Token/Key
You can get Bot_ID and Token for your app from floatbot.ai dashboard
Requirements
- Xcode 9.0
- iOS 8.0+
Dependencies
- SDWebImage
- AFNetworking
Installation
CocoaPods (recommended) For Cocoa Pods Integration
Step 1 : Create a Podfile in your project's root directory, if it doesn't exist yet
Step 2 : Add the floatbot pod in Podfile under your desired target:
For latest release in cocoapods pod 'floatbot'
Step 3 : Run
pod repo update && pod install
Step 4 : Open your project using the generated *.xcworkspace file.
Example
You can find the demo app Here
Visit https://floatbot.ai/developers
Usage
The Basics
• To set the chatbot ID, use
[[floatbotManager sharedManager] setFLB_BOT_ID:BOT_ID];
• To set the chatbot token/key, use
[[floatbotManager sharedManager] setFLB_KEY:KEY];
• To set the chatbot name, use
[[floatbotManager sharedManager] setBOT_NAME:BOT_NAME];• To display sessions list, add following optional method
[[floatbotManager sharedManager] setShowSessionList:YES/NO];
This will take user directly to chat screen if value passed is NO
• Optionally, you can set the mobile number of the user to identify the user. Note: PHONE_NO passed to above method should be the number prefixed with the country code and without “+”.Ex. 9110000001
[[floatbotManager sharedManager] setPHONE_NUMBER_WITH_COUNTRY_CODE:PHONE_NO];
• To set the hash value for each user, add following method
[[floatbotManager sharedManager] setHash:hashString];• To initialize user and load chat screen, add the following method (i.e. onButtonClick or when app launches or after user is validated), Pass UIViewController object as input parameter
[floatbotManager startChatWithViewController:self];
• To set chat screen as root view controller, use
[[floatbotManager sharedManager] setAsRootViewController:TRUE];
• To send APNS token to floatbot server to receive push notification, add following method in your project's -[AppDelegate application:didFinishLaunchingWithOptions:] method
[floatbotManager setToken:deviceToken];• To set google map API key for your app to use the location functinality of floatbot.ai, add following optional method in your project's -[AppDelegate application:didFinishLaunchingWithOptions:] method
[[floatbotManager sharedManager]setGoogleMapsKey:YOUR_MAP_API_KEY];How to get google maps API key
Theme customization
You can customize the chat screen using following optional methods
1.To set incoming message bubble background color
[[floatbotManager sharedManager] setIncomingMessageBubbleColor:[UIColor redColor]];2.To set outgoing message bubble background color
[[floatbotManager sharedManager] setOutgoingMessageBubbleColor:[UIColor redColor]];3.To set incoming message text color
[[floatbotManager sharedManager] setIncomingMessageTextColor:[UIColor redColor]];
4. To set outgoing message text color
[[floatbotManager sharedManager] setOutgoingMessageTextColor:[UIColor redColor]];
Getting started
Configure your project
1.Add following key to your Info.plist file with appropriate message for iOS 10 Compatibility:
- NSPhotoLibraryUsageDescription : Specify the reason for your app to get read-only access to the user’s photo library (To upload files from device)
- NSLocationWhenInUseUsageDescription : Specify the reason for your app to get user’s location
- NSPhotoLibraryAddUsageDescription : Specify the reason for your app to get write-only access to the user’s photo library (To download the image to device)
Starting iOS 10, Apple requires developers to declare access to privacy-sensitive controls ahead of time.
To comply with this new privacy requirement, developers must add the required keys to the Info.plist: Warning! Failing this iOS 10 will exit the app by crashing when user tries to access the photo library to save images.
2: Enable iCloud Capabilities to share files
Add Cloudkit.framework in Link Binary with Libraries. Enable iCloud Documents with Xcode, from tab Capabilities.

3. Enable Background mode for Push notification
Enable Push notification with Xcode, from tab Capabilities.

Uploading your App's SSL Push Certificate
1. Go to the Mac OS finder application, and search for “Keychain Access”. Open it.
2. Find your App’s push certificate in the Certificates section. It will start with the string “"Apple Development iOS Push Services" (“Apple Production iOS push services” in case of production certificate)
3. Expand the row, and you will find the private key.
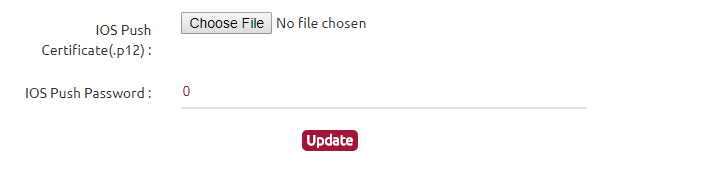
4. Select both the private key and certificate and export it as .p12 file and necessarily set a password.
5. Upload the saved .p12 file in the field below selecting development environment or production environment depending on whether you are using it for dev or production push services.
To generate APNS certificate refer here :
Upload your development / production certificate in Settings page
Importing framework
Follow the simple steps to integrate floatbot SDK to your iOS app
Step 1: Import "floatbot.h" in AppDelegate.m
#import <floatbot/floatbot.h>Step 2: Initialize and configure floatbot for your app.
#define SYSTEM_VERSION_GREATER_THAN_OR_EQUAL_TO(v) ([[[UIDevice currentDevice] systemVersion] compare:v options:NSNumericSearch] != NSOrderedAscending)In -[AppDelegate application:didFinishLaunchingWithOptions:] method add following required methods to configure bot,
[floatbotManager appLaunched];
[[floatbotManager sharedManager] setFLB_BOT_ID:BOT_ID];
[[floatbotManager sharedManager] setFLB_KEY:KEY];
[[floatbotManager sharedManager] setBOT_NAME:BOT_NAME];
The above method will set the name of your bot in the app, which will be displayed on the top of chat screen.
To initialize user and load chat screen, add the following method (i.e. onButtonClick or when app launches or after user is validated), Pass UIViewController object as input parameter
[floatbotManager startChatWithViewController:self];Step 3: Handle Push notification
To enable floatbot to send push notifications to the application, add this implementation of - application:didRegisterForRemoteNotificationsWithDeviceToken: in your AppDelegate file that captures the device token and sends it to floatbot server
Add below snippet in -[AppDelegate application:didFinishLaunchingWithOptions:] method
if(SYSTEM_VERSION_GREATER_THAN_OR_EQUAL_TO(@"8.0")) {
  UIUserNotificationSettings *settings = [UIUserNotificationSettings settingsForTypes:UIUserNotificationTypeAlert | UIUserNotificationTypeBadge | UIUserNotificationTypeSound categories:nil];
  [[UIApplication sharedApplication] registerUserNotificationSettings:settings];
  [[UIApplication sharedApplication] registerForRemoteNotifications];
}
else{
  [[UIApplication sharedApplication] registerForRemoteNotificationTypes:(UIRemoteNotificationTypeBadge | UIRemoteNotificationTypeSound | UIRemoteNotificationTypeAlert)];
}
To set push token, add following method
- (void)application:(UIApplication *)application didRegisterForRemoteNotificationsWithDeviceToken:(NSData *)deviceToken {
    [floatbotManager setToken:deviceToken];
}