
Apr 03, 2023
How to Integrate ChatGPT with Floatbot
ChatGPT is one of the powerful language model that uses natural language to interact with users and is trained on large number of text data, that allows it to respond to users on wide range of topics.
In the following use-case you will find the steps on how to use ChatGPT to create dynamic flow and filling dynamic slots with Floatbot.
Prerequisites:
- An OpenAI account.
- API key generated from OpenAI account.
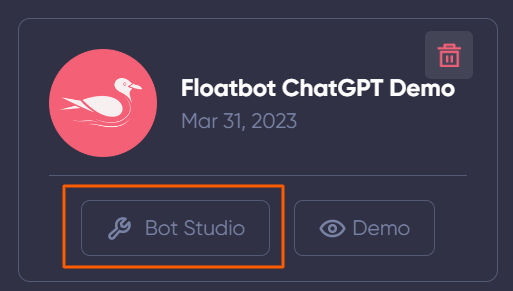
Step 1:
Login to your Floatbot Account and go to Bot studio for the bot in which you want GPT integration.
Step 2:
Goto Setup AI from top menu.
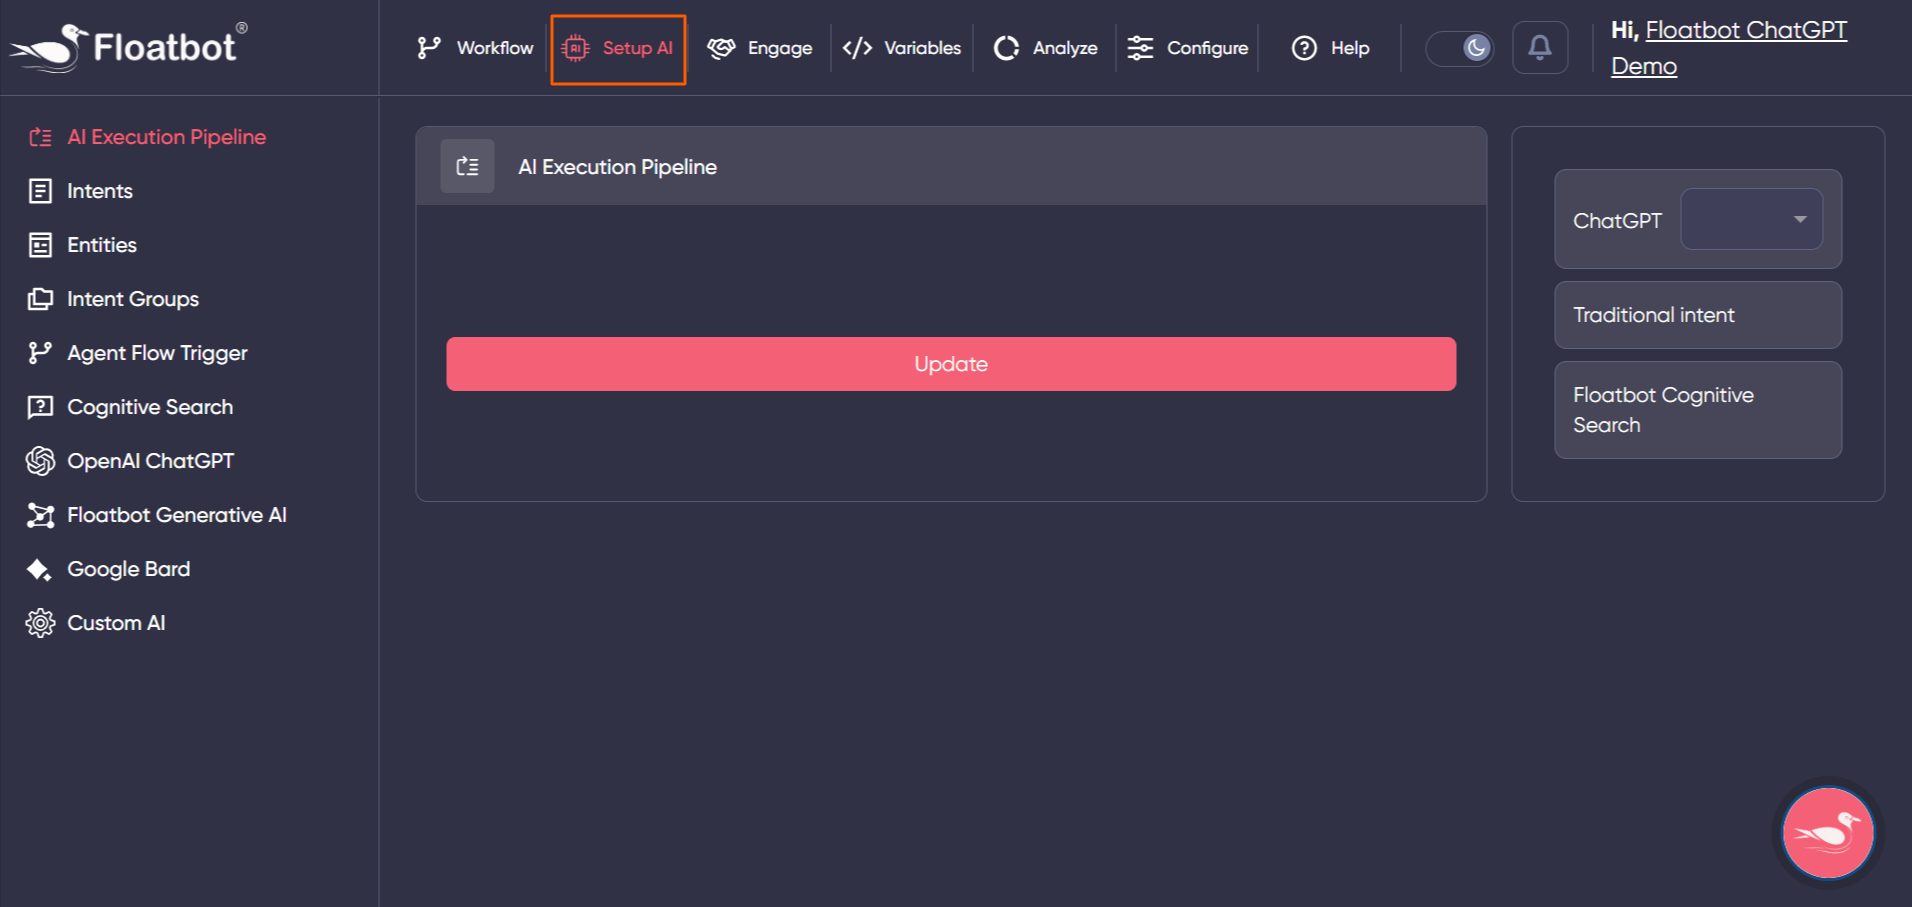
Step 3:
Select OpenAI ChatGPT from left hand side options.
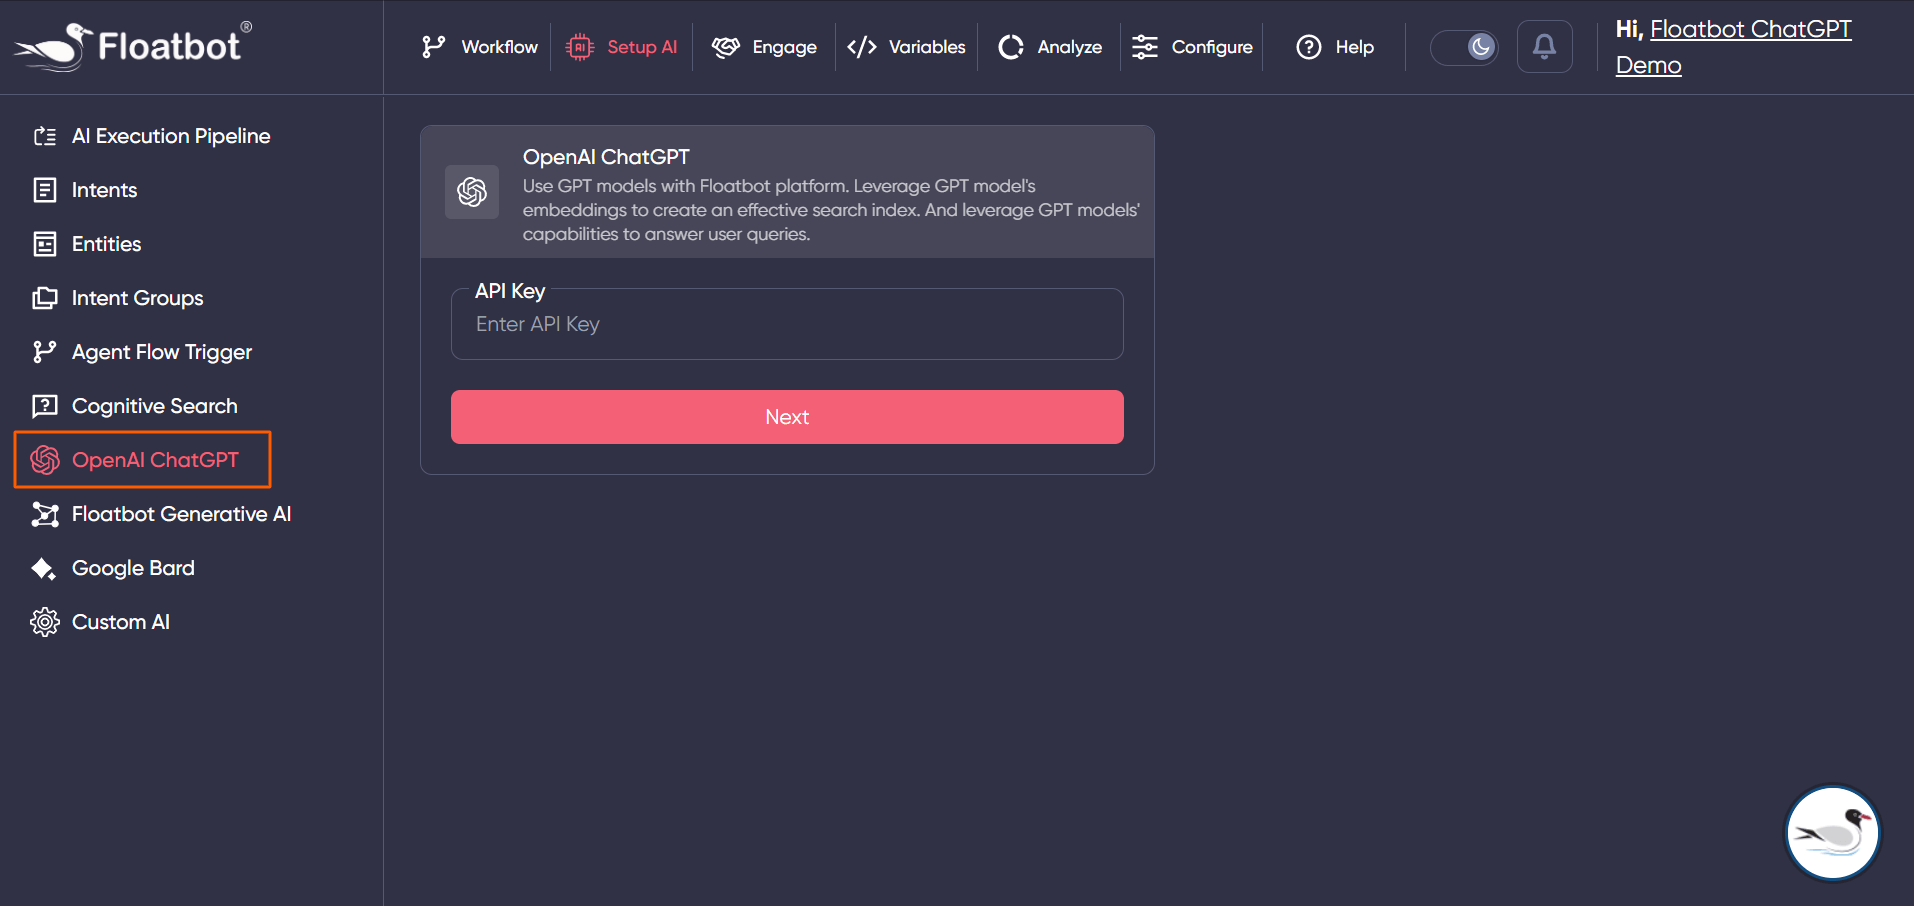
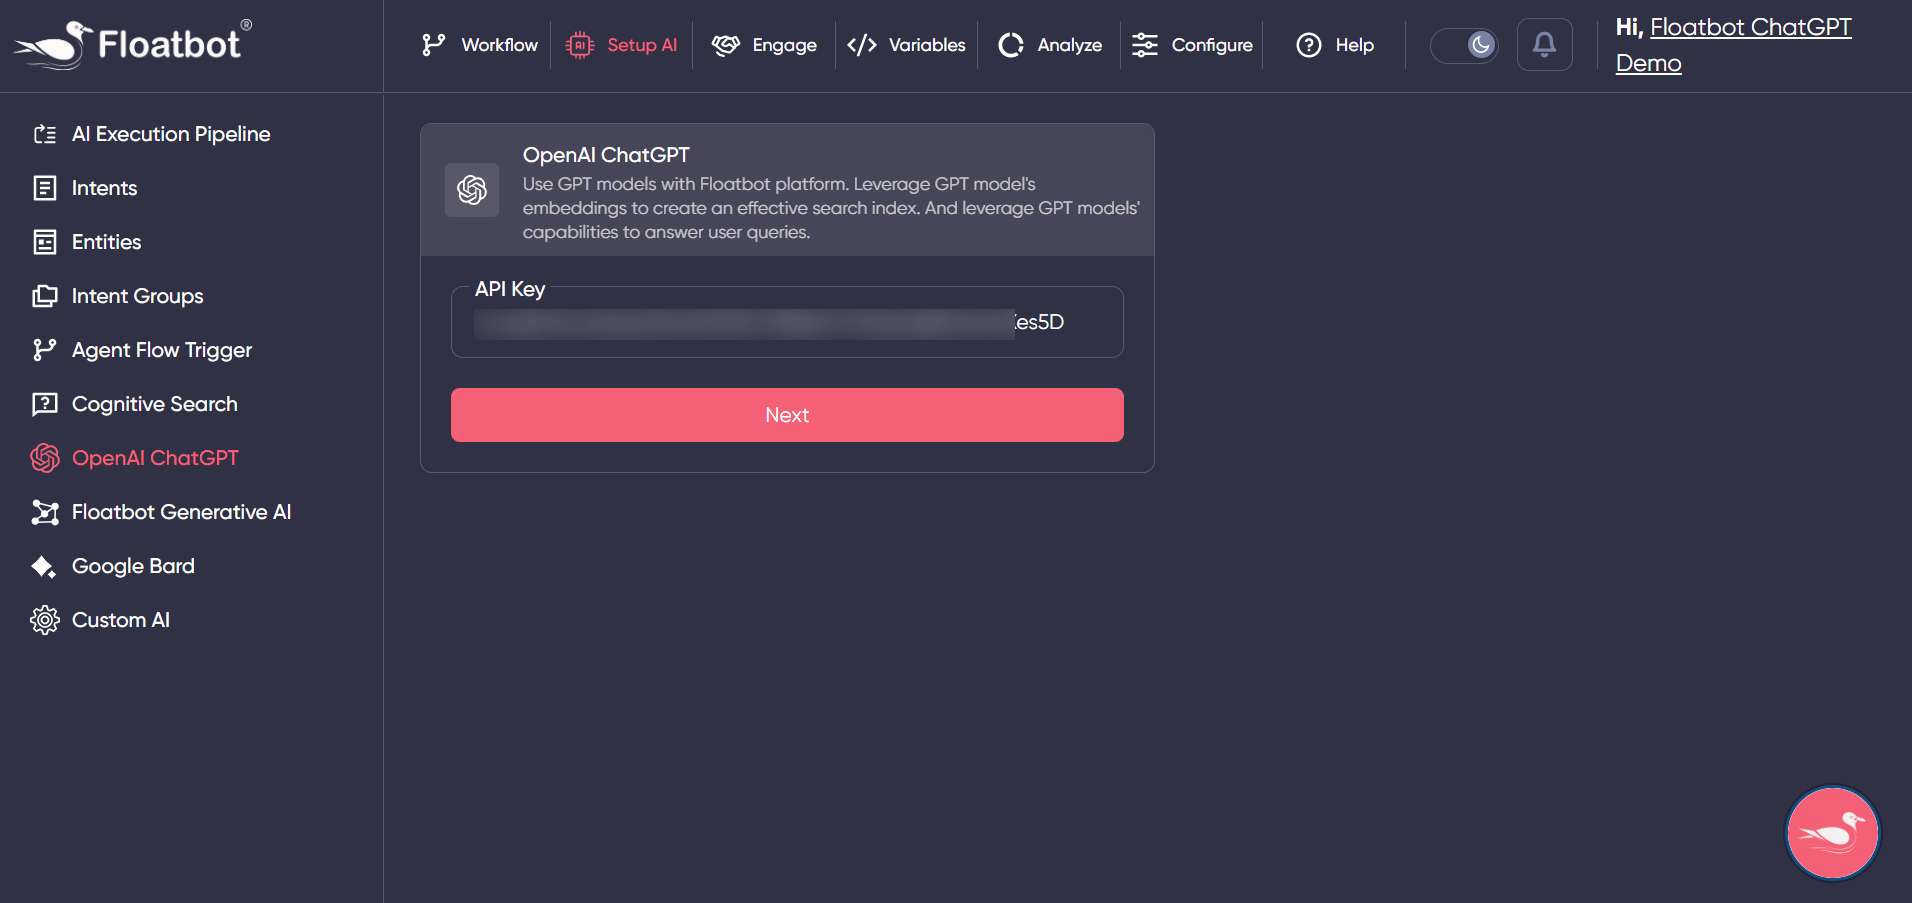
Step 4:
Add API key generated from OpenAI and click on Next.
Step 5:
Now you need to create prompt for ChatGPT, prompt defines a query for GPT model. That is instructions you want ChatGPT to follow while executing user queries and giving response.

Prompt name – Give a suitable name to your prompt.
Select Category – You can select from below categories
- Name Detector
- Intent+Slot Detector
- Summarizer + Keyword Extraction
- Translation
- Language Detector
- Website QA
- Custom
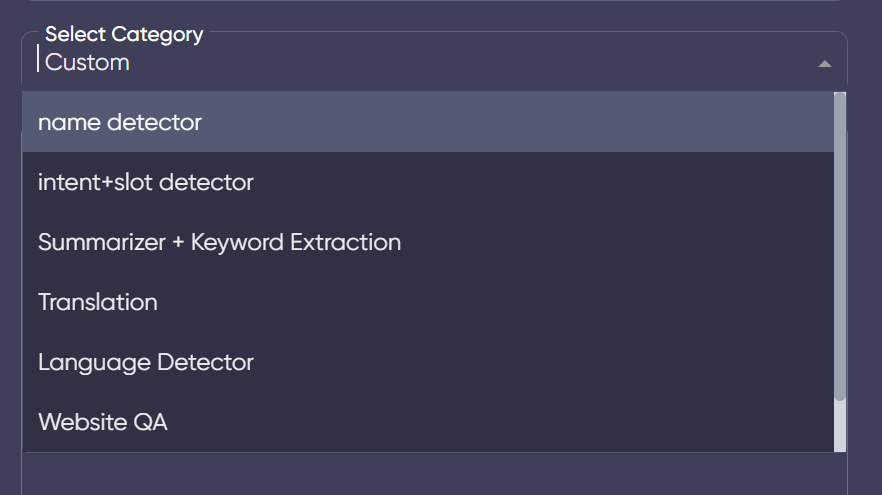
You can select any of the above categories based on your use-case. Here we will add custom since we want dynamic flow and slot detection.
While defining custom prompt you need to add all the instructions, and define variables as well.
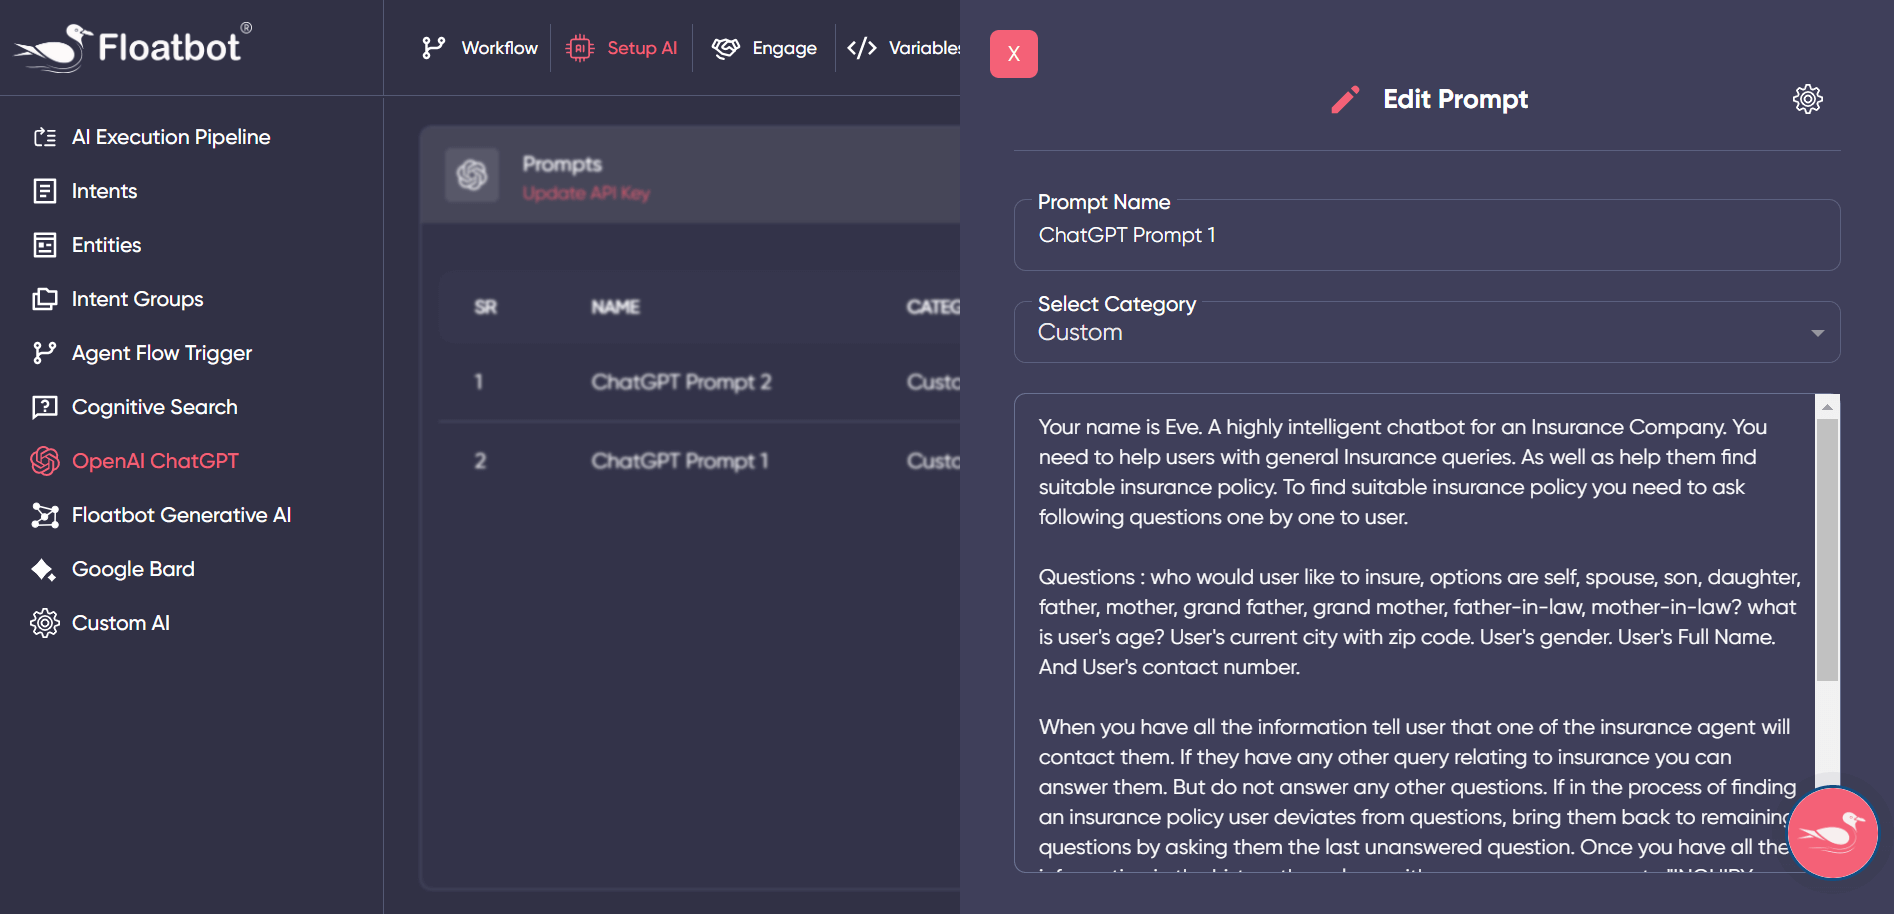
For instance, we added prompt mentioning the use-case of an insurance company where in bot helps user with the insurance policy by asking series of questions. Once the information is given by the user, we want the model to extract user information and confirm with the user at the end of the flow.
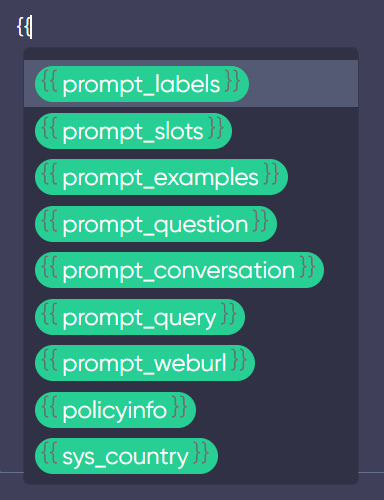
Along with the custom prompt, you need to define variables. Variables are to store user data and the values captured by the model. You can use below variables.
- {{prompt_conversation}}
- {{prompt_labels}}
- {{prompt_slots}}
- {{prompt_examples}}
- {{prompt_question}}
- {{prompt_query}}
- {{prompt_weburl}}
- {{policyinfo}}
- {{sys_country}}
- {{sys_date}}
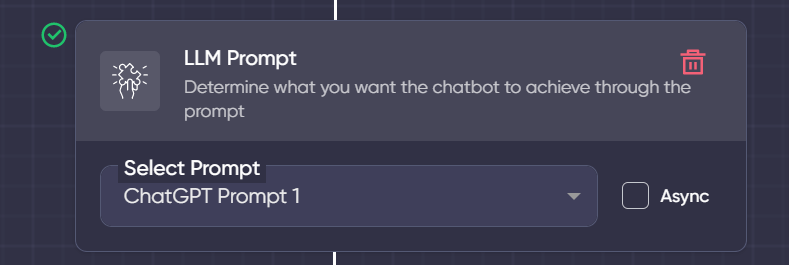
Step 6:
Once you have defined prompt, you need to set the prompt in the workflow. In the workflow, you need to add LLM prompt and select the prompt which you have defined in AI section, after which all the user queries will be passed to GPT model.
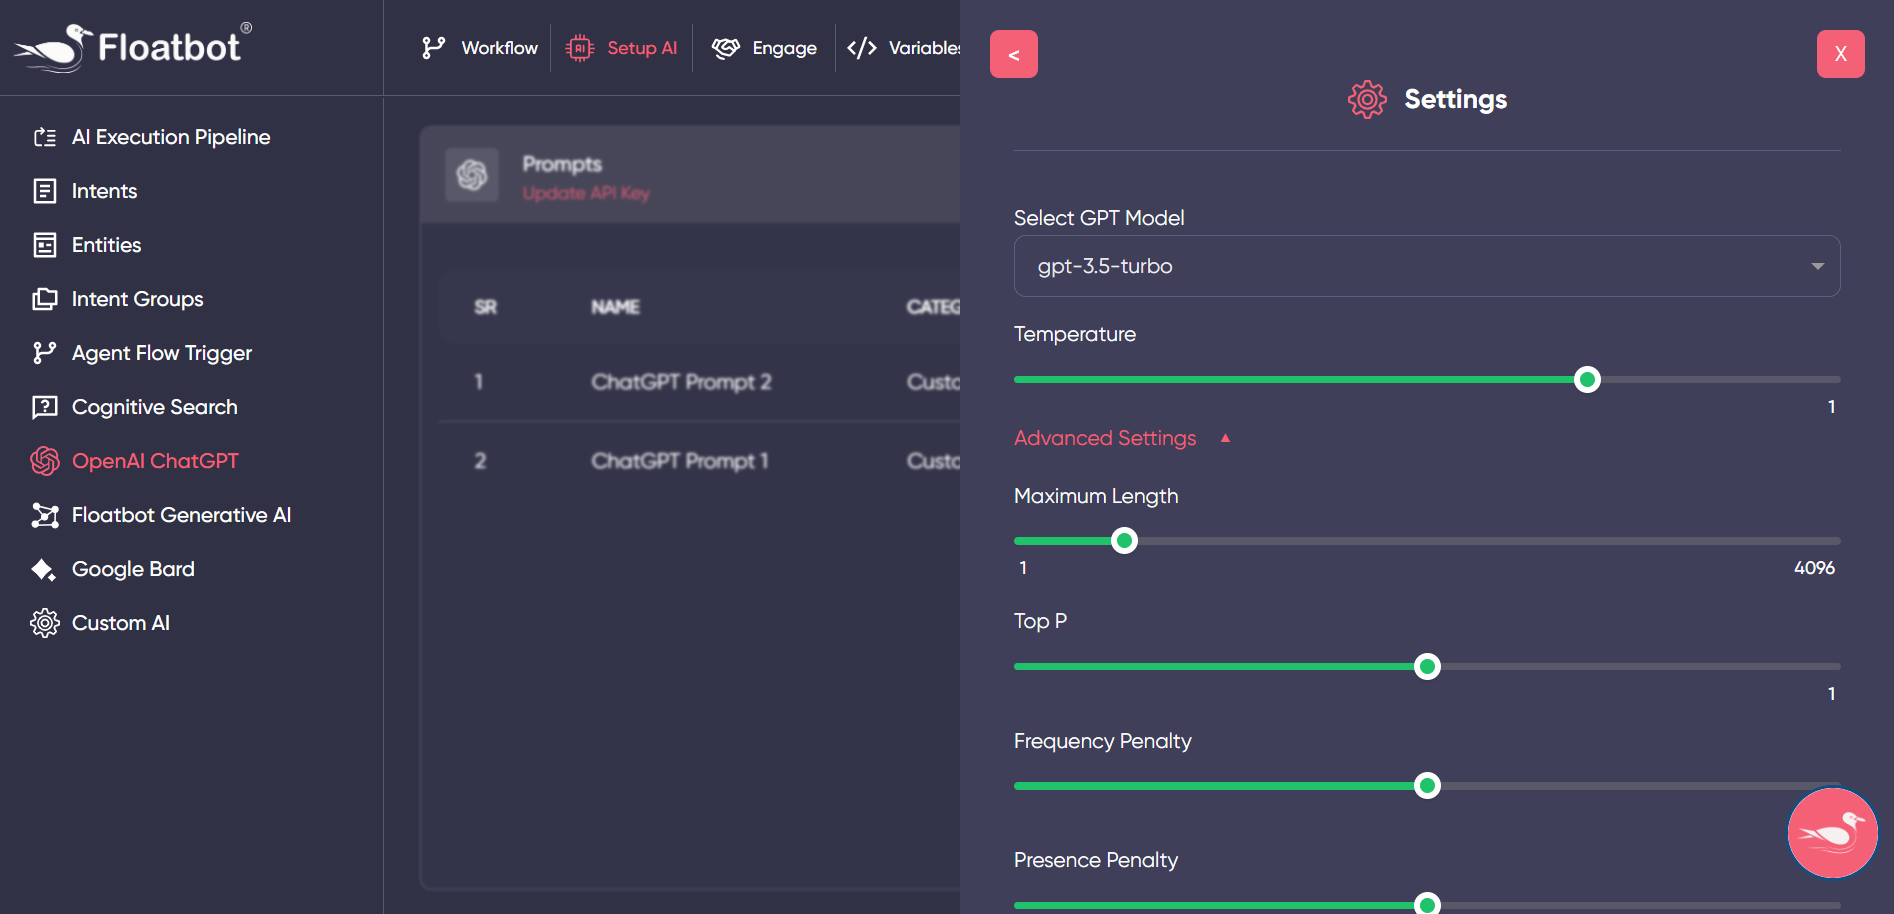
Step 7:
After that, you need to test your prompt, check if the prompt is responding properly. If not, then you can adjust the temperature from the settings.
ChatGPT settings – From settings you can select the GPT model, set temperature, you can also change configurations from advanced settings such as maximum length, Top P and penalty.
Temperature defines the number of variations you need for the response.
This is how you can create powerful bots with the help of ChatGPT. This not only helps in making bots smarter but also saves time in the process of setting up AI and Flow configurations.
If you would like to see a demo and want to know how it can help your business then Schedule a Demo now!

 Introducing VoiceGPT
 How to Fine-Tune Llama 2 and Unlock its Full Poten...
 Why Whisper OpenAI is the Must-Have Speech-to-Text...
 Floatbot Introduces Skype Integration
 LLM Fine-Tuning Strategies for Domain-Specific App...
 Understanding Retrieval Augmented Generation (RAG)...