Floatbot Introduces Skype Integration
Now integrating chatbot on skype made easy with floatbot. Floatbot introduces Skype integration, follow these simple steps and launch your bot on skype
- May 16 2018

Integrating a chatbot in Skype helps you to interact with your customers in a personalized way via chat, video or voice. Here are the steps of integrating Floatbot with Skype.
The first step is to log in to your Floatbot, go to your bot dashboard and click on configure. In configure tab click on Skype setting.
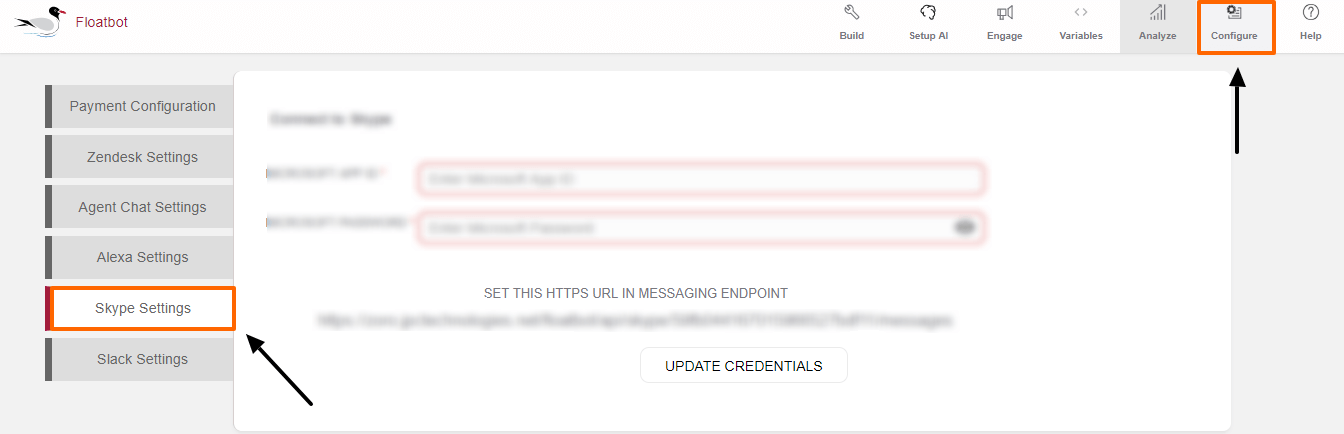
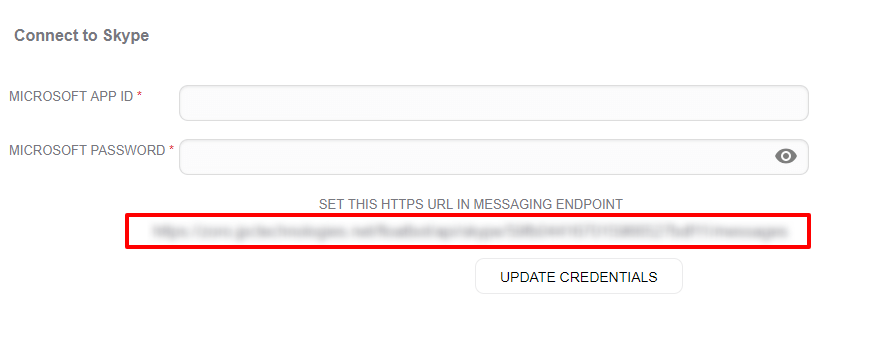
When you click on skype settings, you will see Microsoft App ID, Microsoft password and HTTPS URL.
Let us see where you can get all these details from
The information for Skype settings you will get from the Azure portal. You have to register your bot for their bot service. If your bot is already hosted in Azure portal you will not need to register as your bot will already be registered.
Follow these steps to create a Bot Channels Registration in Azure.
- Click on the New button on the upper left hand corner of the Azure postal, then select AI + cognitive services and the select Bot channels registration.
- A new screen will open in front of you with information regarding Bot channels Registration. Here click on Create button to start the process.
- Fill in all the required details in the Bot service screen.
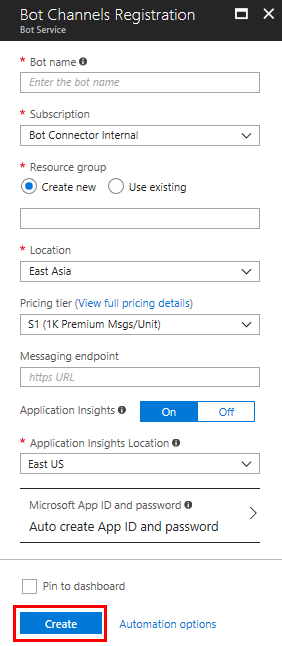
The ones with red asterisk mark are compulsory to fill. Let us know each of the elements here.
Bot name- Give a name to your bot that will appear in channels and directories. This name can be changed any time.
Subscription- Select the Azure subscription.
Resource group- You can create a resource group or choose from the existing one.
Location- Select a location for your bot.
Pricing tier- Select the pricing tier, you may change the pricing tier any time.
Messaging endpoint- Copy this link from Floatbot’s bot dashboard.
Application Insights- You can decide if you want to turn Application Insight On or Off. If you keep it on you will have to specify a regional location.
Microsoft App ID and password- You can use the Auto-created App ID and password or you can manually create it. Microsoft App ID and password will be required on Floatbot’s dashboard.
After you have filled in the details click on create. You will receive a notification confirming the registration, keep a check on the notification tab. You will see a change in the message from Deployment in progress to Deployment succeeded.
Now let us look at Microsoft ID and Microsoft password. You can manually create it or use the one given by Azure.
To generate a MicrosoftAppPassword, follow these steps:
- From the Settings tab, click on Manage. You will see a link in the Microsoft App ID copy that link and paste it on Floatbot’s dashboard.
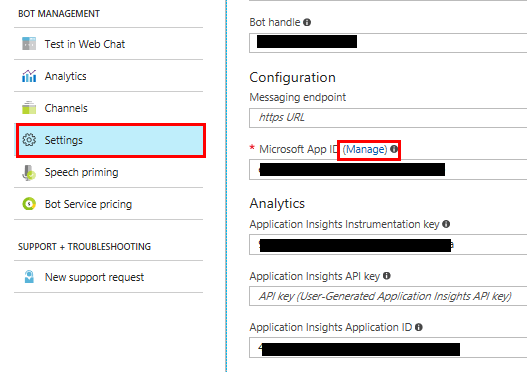
In the same tab, besides Microsoft App ID you will see Manage. Click on manage to see the following screen.
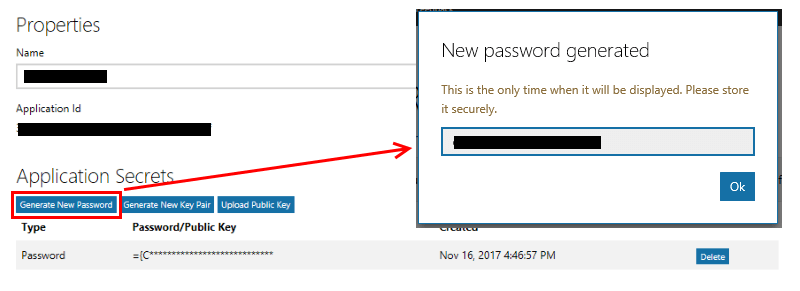
In application secrets. Generate a New password, copy and paste it in the Floatbot’s dashboard.
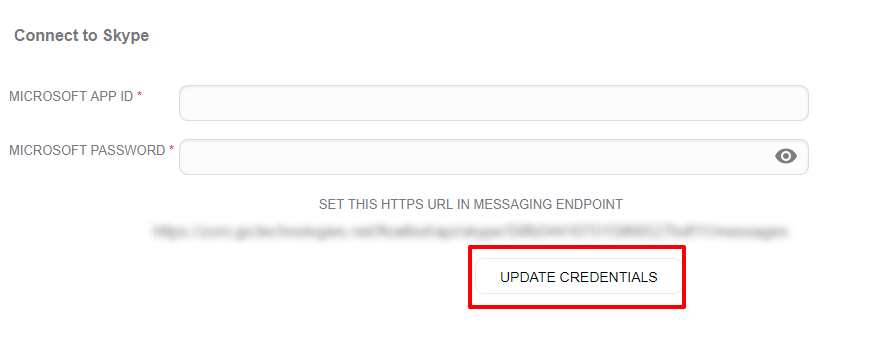
When you are done filling all the details simply click on update credentials and integration is done.


