
Growth is imperative for every business module. As it brings a sigh of relief, but it also comes with a huge responsibility. Especially, when you are closely working with your customers.
You would agree that your customer service team has an important role to play when it comes to grievance management and handling customer queries.
And now chatbot is the new communication tool for query management.
With the use of advanced tools and technologies, they are learning to talk and interact as humans. But there is no denying that robot/bot can’t replace humans or human agent completely.
5 out of 1 times the chatbot needs the help of a human agent.
So do you use a technology that is quick to answer and interact in a personalized format or stick to your current customer support team?
Why not both?
You can integrate your chatbot with popular live chat platforms to give a seamless experience to your customers. As statistics also say, chatbots will power 85% of all customer service interactions by the year 2020
How does it work?
In the above video, you can see, the chatbot was not able to answer a certain query thrice. Then it automatically asked the customer if they would like to switch the conversation to an agent. Here the dedicated agent to the chatbot comes in to handle the query.
The chatbot was integrated with Zendesk live chat. A popular platform for customer service. Live chat has now become the fastest and the most engaging way to meet your customers online. Read below how can you enable Zendesk live chat using Floatbot in 3 easy steps.
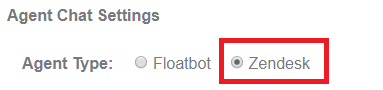
Step 1: Agent Chat Setting
Go to the configure tab on your Floatbot dashboard and click on Agent chat setting. From the given option for Agent type select Zendesk.
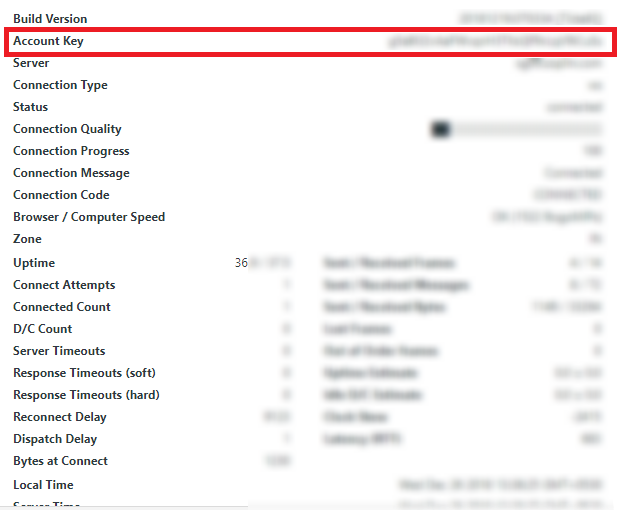
Step 2: Get account key
After you have selected Zendesk, you will see a box below asking for Zendesk Chat Account Key. This key you will get it from Zendesk.

Go to your Zendesk chat account. From the top right go to profile> check connection> Account key. Copy the key, paste in on Floatbot’s dashboard, and click on update.
Step 3: Fall back agent
Below Zendesk chat Account key you will find enable fall back agent. This option is optional. Here, if the chatbot is not able to answer a query thrice then the conversation will automatically shift to the agent.

Integrating Zendesk live chat helps you strike real-time conversations with the users. Where their experience is personalized and you’re able to manage your conversations easily. You can get started today by simply creating your account with us.


